Maintenance
Fixing a Broken Spoke in the Field
What to do when a spoke goes 60 km from anywhere: stop the wheel rubbing, true it roughly by feel, and know when to stop riding it.
It usually happens under load. You are torqueing up a steep technical climb, you shift a bit too late, and you hear a violent snap. Suddenly your pedals spin freely and you tumble sideways into the dirt.
You look down and your chain is lying in the weeds like a dead snake. If you do not have a chain tool and a master link, you are now a hiker. Pushing a 50lb bikepacking rig for 20 miles to the nearest road is a special kind of hell.
Chain failures are rare with modern 12-speed groupsets. When they happen, they are catastrophic. Here is the realistic guide to surviving a drivetrain disaster in the field.
You cannot fake a chain repair with pliers or a rock. You need two specific pieces of hardware to get moving again.
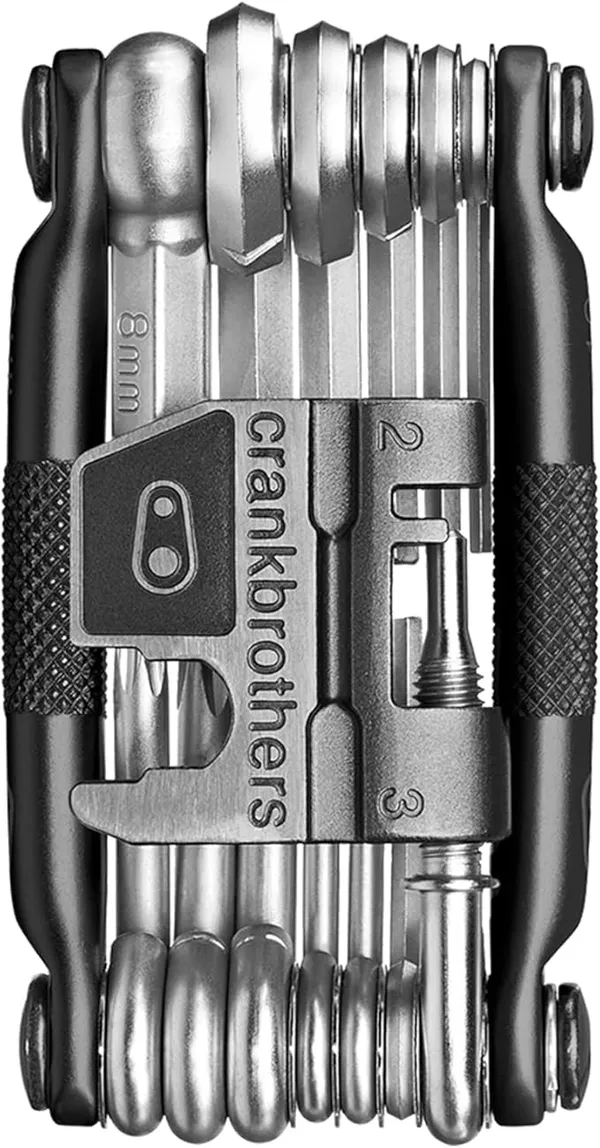
First, you need a dedicated chain breaker. Most generic multi-tools have weak chain breakers that bend when you apply real torque. The breaker on the Crankbrothers M19 because the cast steel body provides enough leverage to actually push a stubborn pin out.
Second, you need compatible master links. Buy two quick links and tape them directly to your brake cables. Make sure they match your exact drivetrain speed, as 11-speed links will bind horribly on a 12-speed cassette.
Jake’s Hack: Tape a spare master link to your derailleur cable housing. It is impossible to lose in the mud. You will not have to dig through your clean saddle bag while your hands are covered in black grease.
Best Budget Bikepacking Gear 2026: 10 Affordable Essentials
A full bikepacking setup without the flagship prices. Ten budget picks under $120 each, with the three that are false economy named.
Do not panic and start yanking on the derailleur. Assess the damage first. If the outer plates are twisted, you have to remove that entire section of the chain.
Use your chain tool to push the pin out of the damaged link. The friction point here is keeping the chain seated in the tool cradle. If the chain slips while you turn the driver, you will snap the driving pin on your multi-tool.
You want to end up with two narrow inner links facing each other. Wipe the mud off these ends so the new link can seat properly. Insert one half of the master link into each open end of the chain.
Hook the two halves together and pull the chain taut. To seat the link firmly, rotate the pedals so the quick link is on the top run of the drivetrain. Hold the rear brake tight and give the right pedal a firm, violent stomp.
You will hear a loud click. You are back in business.
The Ultimate Bikepacking Gear List for Beginners (2026 Guide)
Everything you actually need for a first multi-day gravel trip in 2026, from bags to sleep systems, with the kit we would skip and why.
Sometimes the chain survives but the derailleur does not. If your derailleur gets sucked into the rear spokes, your trip is not necessarily over. You can bypass the broken derailleur entirely by converting to a singlespeed setup.
Remove the broken derailleur and shorten the chain drastically. Find a gear combination that gives you a perfectly straight chainline from the front chainring to a middle cog. Pull the chain tight and install the master link.
You will need a lot of tension to keep the chain from dropping over rough terrain. It will be a miserable and slow ride. However, you will be pedaling instead of walking.
Warning: Modern full-suspension bikes experience chain growth as the rear suspension compresses. If you make a singlespeed chain too tight on a dual-suspension bike, hitting a bump will snap your frame or destroy your hub. You must lock out your rear shock entirely before riding a field-expedient singlespeed.
Keep your drivetrain clean and shift before the gradient spikes. Always carry a spare master link. Maintenance is cheap, but hiking in cycling shoes is agonizing.
The repair starts before the tool comes out, and rushing this step is how people end up with a chain in three pieces.
Shift onto the smallest chainring and smallest sprocket first if the drivetrain still turns. That takes tension out of the system and gives you slack to work with.
Find the damaged section by running the chain slowly through your fingers. Damage is rarely a single link. A chain that snapped under load usually has a stretched or twisted link either side of the break, and leaving those in place means doing this again in ten miles.
Seat the chain squarely in the tool before you turn anything. A pin driven at an angle mushrooms the plate and ruins the link you were trying to save.
Push the pin most of the way out rather than all the way. On most chains you can leave it seated in the outer plate, which makes reassembly far easier if you are joining without a quick link. On Shimano 11 and 12 speed this does not apply, because the pin is single use and the chain must be rejoined with a link.
When the quick link goes in, seat it by putting the chain in the big ring and standing hard on the pedal with the brake on. You will hear it click home. A link that has not seated fully will come apart under load, usually on a climb.
If you removed links and have no quick link spare, you can still ride, but the gearing rules change.
A chain shortened by two links will no longer reach the largest sprocket in the big ring. Going there will destroy the derailleur, the hanger, or both. Decide before you set off which combinations are now forbidden, and if the chain is very short, consider running it as a singlespeed with the derailleur bypassed entirely.
Ride seated, spin rather than mash, and treat every steep section as a walk. The repair is there to get you home, not to be raced.
The kit is small. A chain tool with a rigid body, two quick links matching your chain speed, and a short length of the same chain if you have it.
Store the quick links somewhere you will find them in the rain. Taped inside the multi-tool case or a small tin in the frame bag beats loose in a pocket. A quick link dropped in gravel at dusk is a quick link you no longer own.
Test the chain tool at home before it matters. Cheap folding tools flex enough that they will not push a stiff pin, and finding that out on the trail is the wrong time.
Only if the break is clean and you have a quick link, which is rare. A chain that snapped under load almost always needs damaged links removed first, and that needs a tool. This is why the chain tool is the one item worth checking before every trip.
Two, matching your chain speed. One is the repair, the second is for when the first is dropped in gravel or the chain fails twice. They weigh almost nothing and cannot be improvised.
Manufacturers say no, and for good reason: the plates deform when it is opened. In the field, reusing one to get home is an accepted risk. Replace it as soon as you are back rather than leaving it on the bike.
Not the big ring with the largest sprockets. A chain shortened by two links will go tight and destroy the derailleur or the hanger. Work out which combinations are now forbidden before you ride, and stay seated on climbs.
Usually a shifted-under-load moment on a worn chain, or a previously damaged link that was never spotted. Chains rarely fail without warning: checking chain wear regularly and running the chain through your fingers after a hard ride catches most of it.
What to do when a spoke goes 60 km from anywhere: stop the wheel rubbing, true it roughly by feel, and know when to stop riding it.

Sealant will not close a gash. How to plug a tubeless tyre at the roadside, when to give up and fit a tube, and what to carry for both.
The multi-tool, pump and spares that turn a ride-ending mechanical into a twenty-minute roadside stop. Five picks we would carry on a remote gravel route.

Jake has spent the last 5 years pushing his bike through the muddiest backroads of the Pacific Northwest. He isn't a professional racer, but he knows exactly what gear breaks first and what actually lasts when you're 40 miles from the nearest town.